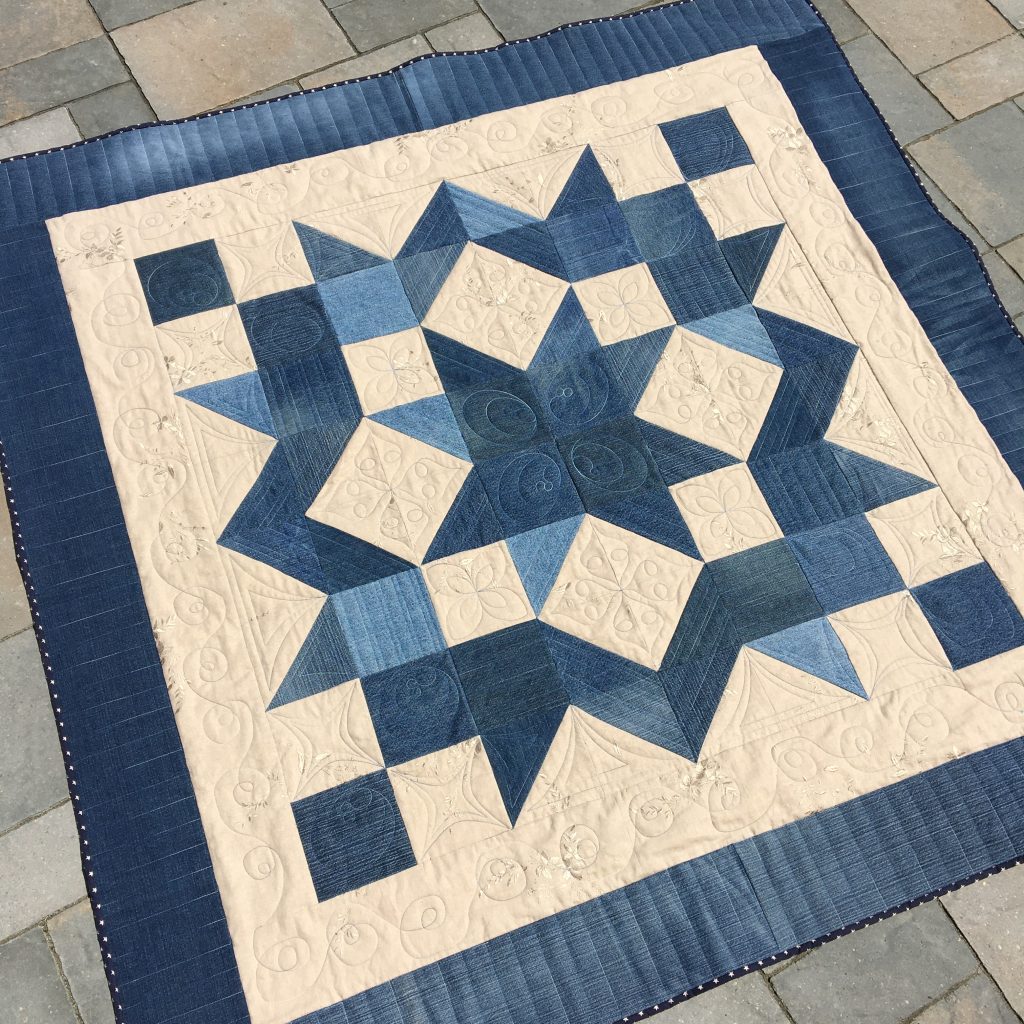
Looking for a project to use all those saved, no-longer-used denim jeans? This up-cycled denim quilt is not only good on the eyes, it is utilitarian. Use it for a wall hanging, as a lap blanket or my favorite…a picnic blanket. My goal when saving back my old jeans was to make a picnic blanket. I needed a blanket that would be easy to grab out of my trunk for an impromptu picnic. Those are the best. And since this quilt is already made from almost discarded fabric I feel good about recycling and won’t be sad if it is stained from either food or the ground. Instructions are written below. If you would like a more concise, detailed pattern, a PDF of the pattern may be purchased for $11.98 in my shop.
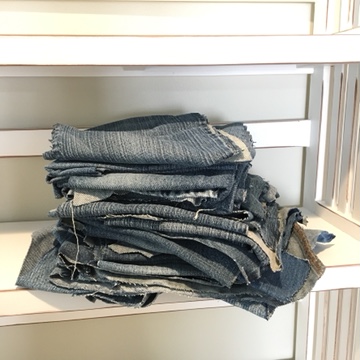
Please know that it is not required to up-cycle materials to make this project. The pattern would look lovely in florals, solids, plaids, stripes, etc. The 2 main materials I used for this quilt were old denim jeans (6-8 pairs) and old linen tablecloth fabric (approx. 1 1/2 yards). For the backing, I found a plaid from my stash and combined it with extra tablecloth linen. (3 3/4 yards total needed for backing.) I used a very thin batting to enhance the stitch definition a bit.
Cut Pieces
Cut the following from Denim Jeans: 16 – 6” squares, 20 – 5 1/2” squares, 2 – 6” x 50” strips (you will need to sew together a couple of shorter strips to achieve this length) and 2 – 6” x 61” strips (again, you will need to sew together a couple of shorter strips to achieve this length).
Cut the following from Contrasting Fabric: 16 – 6” squares, 12 – 5 1/2” squares, 2 – 5” x 40 1/2” strips (you may need to sew together a couple of shorter strips to achieve this length), 2 – 5” x 50” strips (again, you may need to sew together a couple of shorter strips to achieve this length)
Piecing
To piece half square triangle blocks, select one 6” denim square and one 6” contrasting square putting right sides together. With marking pen, draw a diagonal line from one corner to the opposite corner. This will be your cutting line but don’t cut yet. Now mark a line ¼” on both sides of the diagonal line drawn. These will be your sewing lines. Want to learn more about HST Units view this article “HOW TO MAKE HALF SQUARE TRIANGLES”.
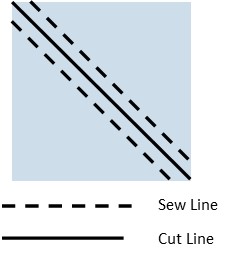
Sew on the ¼” lines and cut down the center line – you now have 2 HST Units measuring 5 1/2”. Press the seam open to alleviate the denim bulk. Use the 5.5” or larger Bloc Loc ruler to square-up square or other means to square up. Repeat this process for the remaining 6” squares. (32 HST Units)
TIP: I like to cut my starting squares for half square triangles a little larger (.25″ – .5″) than the pattern dictates. This gives me an opportunity to square-up the HST units once they are sewn. Piecing with these units helps my quilt project go together smoother, with seams and points matching perfectly. Squaring-up is making sure all corners of the newly formed square are 90° angles and all sides are the same length.
Tools for squaring-up blocks: Bloc Loc HST rulers are my go to rulers to square up my HST units. They are grooved to snug the seam making it a breeze to trim the blocks to perfection.

Putting the Pieces Together
Stitching Blocks into Rows: Layout blocks according to the row layout guide. With right sides together, stitch blocks together working from left to right. Press seams open. Repeat this for the remaining rows.
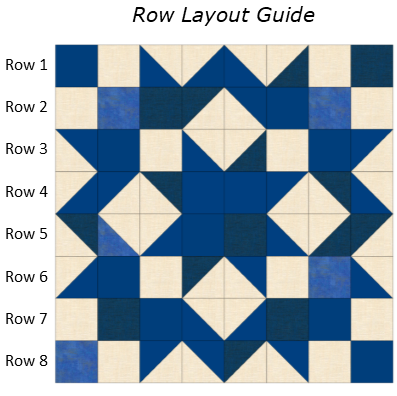
Stitching Rows Together: With the right sides together, stitch the rows of blocks together referring to the row layout guide if needed. Press seams open.
Add borders (refer to border layout guide): Using the 2 contrasting fabric strips 5” x 40 1/2”, with right sides together, stitch one of these to the left side of the quilt and one to the right side of the quilt. Using the 2 contrasting fabric strips 5” x 50”, with right sides together, stitch one of these to the top of the quilt and one to the bottom of the quilt. Using the 2 denim fabric strips 6” x 50”, with right sides together, stitch one of these to the left side of the quilt and one to the right side of the quilt. Using the 2 denim fabric strips 6” x 61”, with right sides together, stitch one of these to the top of the quilt and one to the bottom of the quilt.
The quilt top is now done. Back, quilt, and bind your quilt in the manner of your choice.
Quilting Ideas
When it came time to quilt, I decided to quilt it on the longarm. I wanted to play a little, so after sketching some ideas on paper, I used rulers, computerized designs, and free-motion quilting. Stitching the piano keys all around the outer edge was the most fun. I will be doing that again in future quilts 🙂


Happy Quilting – God Bless!
Sonya
Entrepreneurship flows in Sonya’s blood. Some businesses include an artistic rubber stamp manufacturing business, opening and running a bed & breakfast, having a fabric and yarn shop, and currently growing her professional longarm quilting business. As a serial entrepreneur, she loves to mentor and coach small businesses. She misses farm life, loves to travel, and enjoys her husband, children, their spouses, and of course the grandkids.