~”Oh the weather outside is frightful but craft time is so delightful!”~
When we are not preparing the holiday meals, us Nelsen’s enjoy some crafting during Christmastime. This year Alex brought some beadwork with her so that we could all make bracelets together. Initially, we thought we would just be walking away with one bracelet each, but once we got going there was no stopping us! Between the three of us girls, we made a total of 12 bracelets! What are we going to do with them all? Wear them of course! – And maybe give some of them away 🙂 We are also planning to make our own personalized zodiac bracelets that will show our personality and traits.
It was such a great time to come together as sisters and create something together. That quality time is one of my favorite parts of coming home for Christmas. No matter where we are, if we are all together, we are home.
The following is a tutorial of one of the types of bracelets we made. I especially liked this type of bracelet because it was so classy and ended up matching the outfit I was wearing at the time!

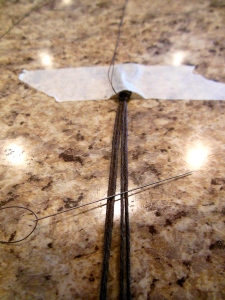
Begin with a strand of hemp cord (in this case we used waxed Irish linen cord which worked nicely) that is long enough to fit around your wrist with a little extra room. Quadruple this amount by folding it over three times and cut. You should have four strands with one loop on one end and two loops on the other. Take the end with two loops and make a knot to create a loop big enough for your button to slide through.Then tape your loop to the table and cut the single loop on the opposite in order to have four loose strands (Figure 1).

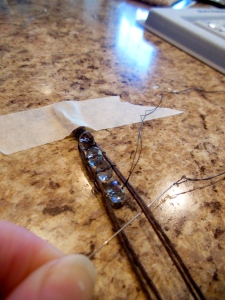
Separate your strands into pairs and then tape the ends to the table about pencil width apart, keeping the strands taut. Then take thread (we used nylon thread) and double it and knot it right up next to your cord knot. Next, start “figure-eighting” with your thread and needle. (Figure 2) To figure-eight, take your needle and start from the outside of the left strands and go under them and up into the middle section. Then go over the right strands and come around and under them, coming up into the middle section. Then go over the left strands and come around and under them, coming up into the middle again. Do this over-under “figure eight” movement several times, sliding the thread up to the knot tightly after completing the figure eight.

Now you are ready to begin adding beads! Your thread should be coming up from the middle at this point. Thread your bead onto the strand (Figure 3).

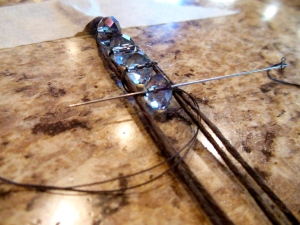
Then begin your figure eight by going over and around the right strands (or left strands depending upon at what point in the figure eight you placed your bead). (Figure 4)

As you are coming up the middle thread your needle through the bead and pull your thread all the way through. (Figure 5)
Now go over the left strands and around and come under them into the middle (Figure 6). You have now completed the figure eight pattern and are ready to add another bead! (Figure 7).

Continue adding the beads in the figure eight pattern until your bracelet reaches the desired length. At that point, stop adding beads, but figure eight several times to end your piece. Knot the thread (we used clear finger nail polish to secure the ends of the thread knots to the bracelet after finishing).

Now take the middle two strands (one from each pair) and slide them through the shank of your button. Use the remaining two strands to knot the button onto your bracelet. (Figure 8) After knotting it a couple of times, double check that your bracelet fits. Then cut the strands and fray the edges.

And you’re done! (Figure 9)
Good luck crafting!
~Courtney Rose~
Courtney is a member of the GE Creative Team and is the monkey in the middle of this trio of sisters. Her degree might be in English and Spanish Education, but she’s following God’s call on her life and pursuing full time ministry with The Navigators. If she’s not crafting, reading, or hanging with her hubby, you’ll probably find her at a local coffee shop sipping her caramel latte and opening up the Bible with college women.


